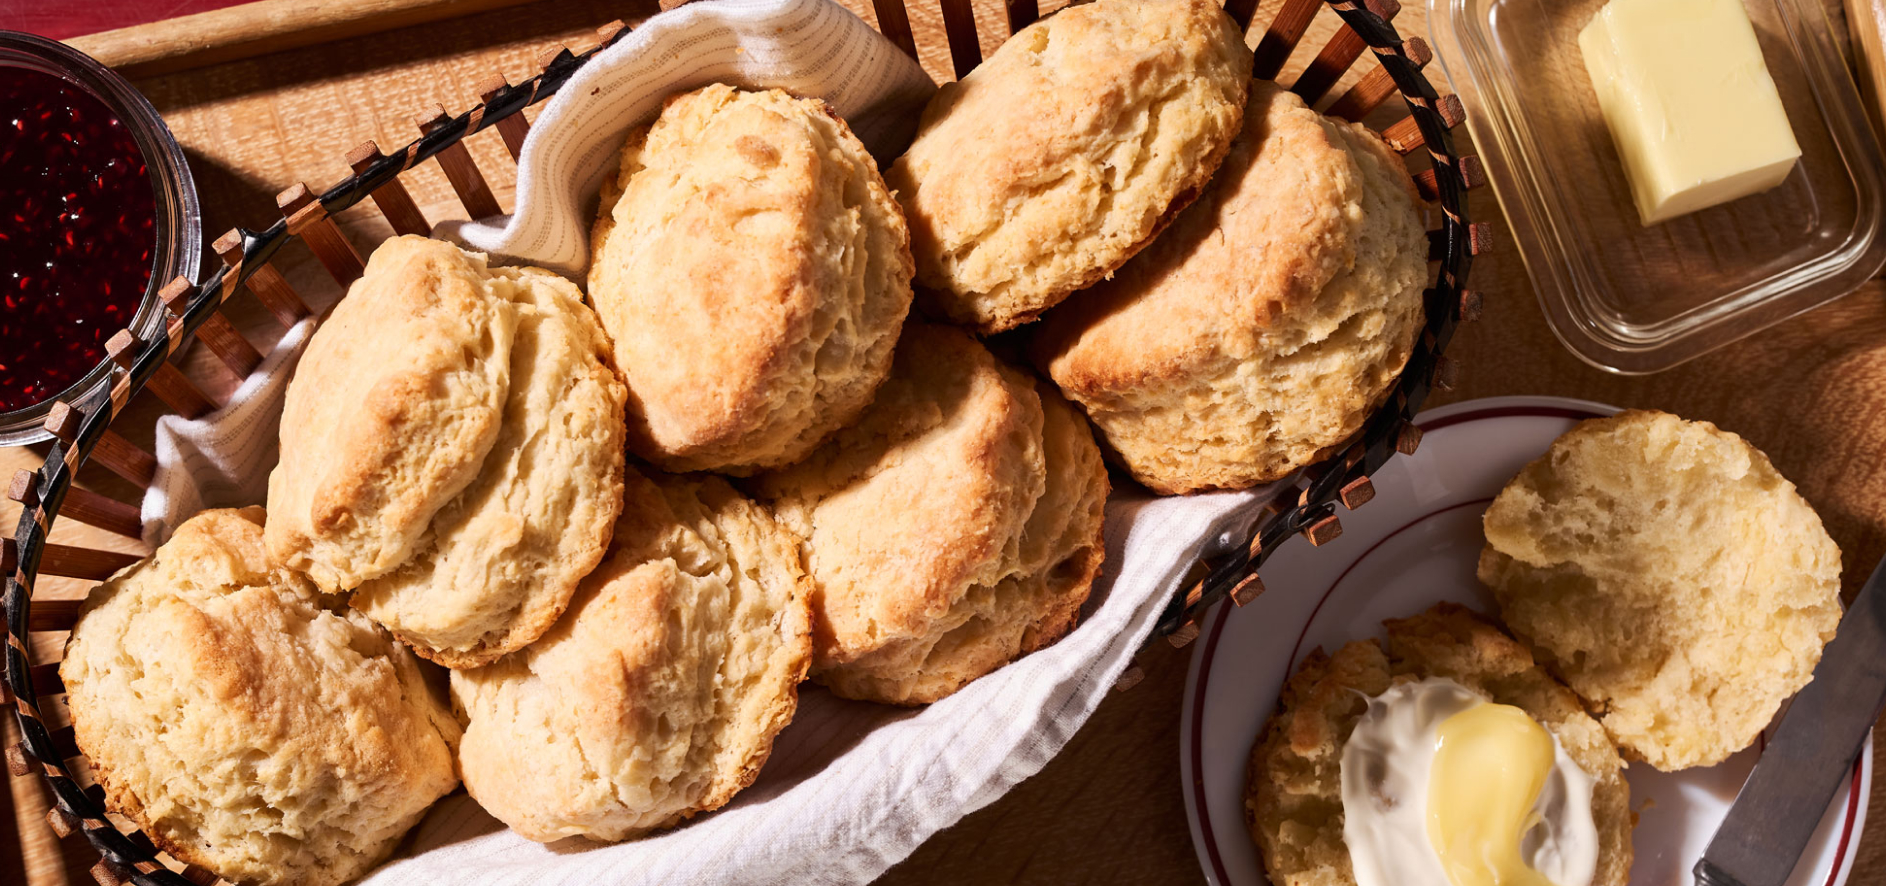
How to Make Butter Biscuit Dough at Home
Whether drizzled with honey or smothered in a rich gravy, homemade biscuits are a welcome indulgence on any table. A basic butter biscuit recipe can be a canvas for your creativity with additions like chives and other herbs, cheese or even fruits. Learn how to make biscuit dough with your KitchenAid® stand mixer and accessories to get started, then put your own spin on this classic comfort food.
Can You Use Butter Instead of Shortening in Biscuits?
Yes, you absolutely can use butter instead of shortening in biscuits. Butter generally creates flakier biscuits with more layers and a sweet, buttery flavor vs shortening biscuits but can be more difficult to work with. Because butter has a lower melting point, you need to move more quickly when preparing your dough and may need to stop and chill the biscuit dough from time to time.
What Is the Difference Between Butter Biscuits and Shortening Biscuits?
Butter is 80% fat and 20% water. The water content in butter turns to steam as it bakes and puffs up the biscuit dough to create tender layers. This makes butter biscuits light, moist and flaky with a melt-in-your mouth richness. Shortening is all fat with no water so may result in a slightly denser, soft and crumbly biscuit.
However, there are a few advantages to shortening biscuits. First, its lack of water content means it’s less likely to create gluten, reducing the chances of a tough biscuit dough. Shortening also has a higher melting point which means it’s harder to “overwork” vs butter. If you prefer to work with shortening, but want the beautifully golden finish of a butter biscuit, you can always brush a bit of melted butter on top before baking.
Whether you choose butter vs shortening for biscuits really comes down to your preference and what you plan to pair it with. All-butter biscuits will be more flavorful on their own while shortening biscuits are perfect for soaking up delicious sauces, stews and gravies.

What Kitchen Tools are Needed to Make Butter Biscuit Dough?
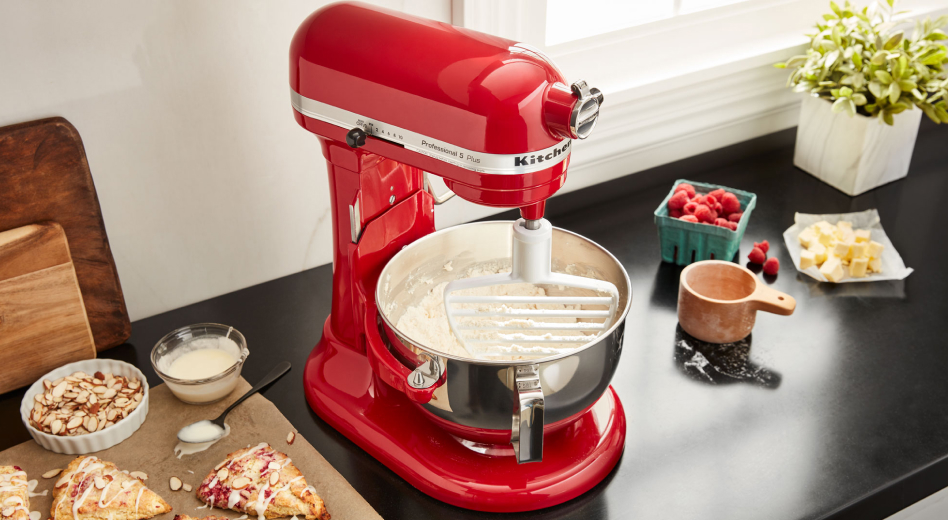
Homemade biscuits can be made by hand with simple kitchen equipment, but the process can be sped up with tools like a stand mixer and specialized accessories. Here are the basic tools you’ll need for homemade biscuits from scratch.
Mixing bowl
Knife to cube butter
Spoon or spatula
Pastry blender or butter knives
Biscuit cutter
Pastry brush (optional)
Recommended Tools for Making Biscuits at Home
A stand mixer and some helpful accessories can enhance your biscuit making process. Adding these tools to your routine allows you to quickly create a batch of light and flaky biscuits with less effort.
Stand Mixer: Choose from KitchenAid® tilt-head stand mixers for a few batches at a time, or bowl-lift models to take on even bigger batches.
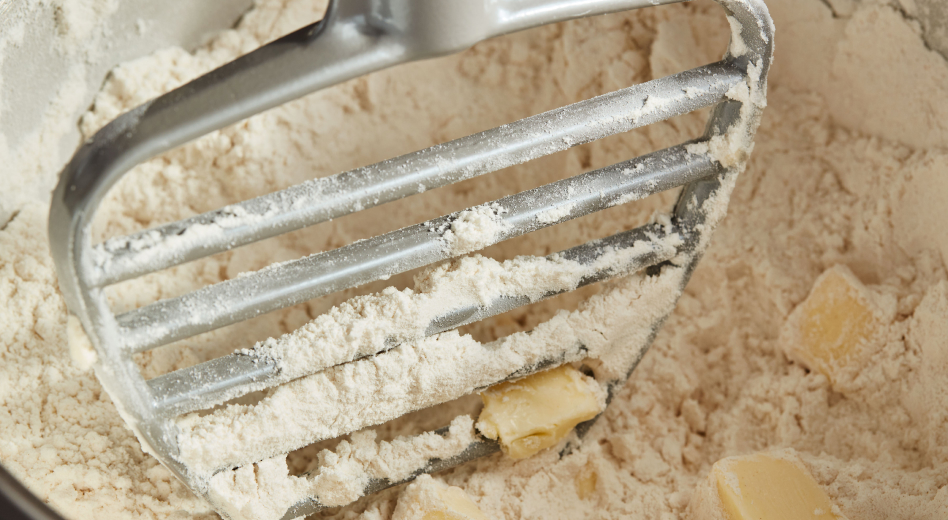
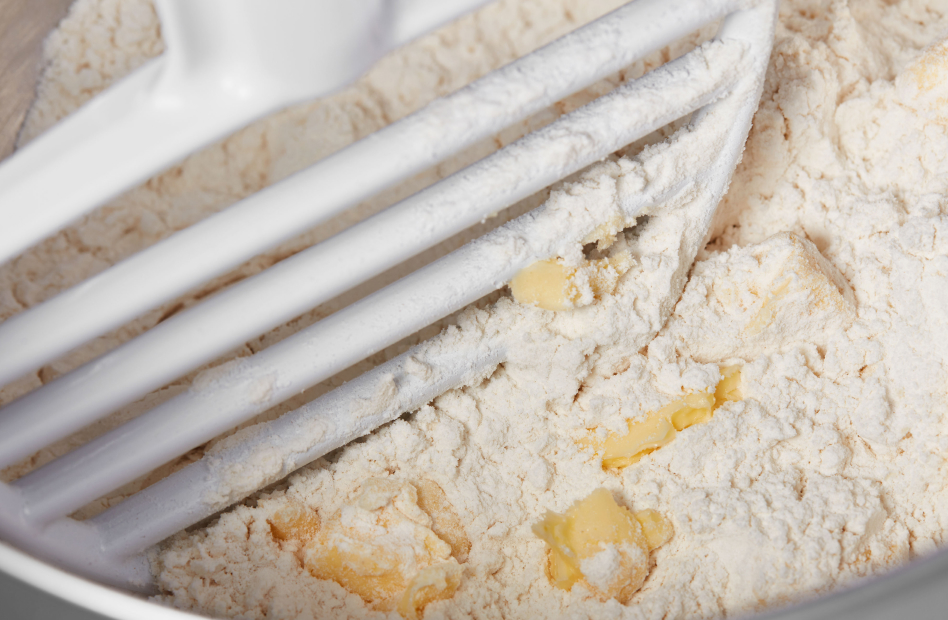
KitchenAid® Pastry Beater: This stand mixer beater accessory is specially designed for the challenging task of cutting cold butter into flour and can replace hand-held tools like a pastry blender or butter knives.
Note: Cutting butter into flour is an essential technique that involves breaking butter into small chunks completely coated in flour. It’s important to maintain solid pieces of butter (or shortening) in order to create pockets and layers within the dough as it melts. Learn more about cutting butter into flour for a range of recipes.
How to Cut in Butter for Biscuits
You can cut in butter using a hand-held pastry blender or two butter knives to literally cut the butter over and over into smaller and smaller chunks. The KitchenAid® Pastry Beater is an excellent substitute for these manual methods and can help create consistently sized butter pieces. To use it, simply connect it to a compatible KitchenAid® stand mixer1 and set to speed 2. The open mixer bowl makes it easy to keep an eye on the mixture and stop it at just the right time.
1. Fits all 4.5 and 5 quart KitchenAid® tilt-head stand mixers and select bowl-lift models. Does not fit models KG25, 5KPM5, 5K5, 4KSM5, K5SS, KSM5, KSM50, KSM500, 3KSM5, 9KSM5, and KSM450.

Ingredients for Homemade Biscuit Dough
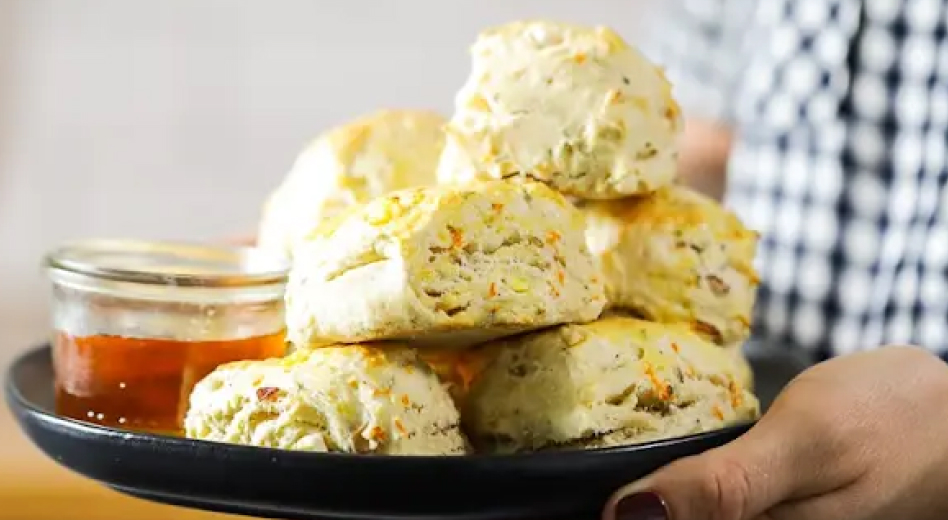
There are many ways to bake a biscuit—all of them delicious. Most recipes will have a few basic ingredients in common, but feel free to put your own spin on it. Most of the base ingredients you’ll need are pantry staples, making this a recipe you can put together on a whim. Here are the commonly found ingredients for homemade biscuit dough:
Milk
Flour
Baking Powder
Baking soda
Salt
Butter (or Shortening)
The biggest variation you’ll see in homemade biscuit recipes is with the milk. You can use anything from 2% to whole milk and even cream. Buttermilk adds a tangy flavor to biscuits that help balance out the fat and sweetness from butter and milk on it’s own. If you’re out of buttermilk, just use regular milk plus white vinegar as a nearly indistinguishable alternative.

How to Make Biscuits at Home
Making stand mixer biscuits is a simple, easy process that allows you to cut in butter and mix the rest of the biscuit dough ingredients all in one appliance. Biscuit recipes are varied and can be adapted however you like them. These tips can help you get familiar with how to make everyday flaky biscuits at home before you begin experimenting on your own.
Step 1: Cube Butter
Remove the butter from your refrigerator and cut into 1 inch cubes. When you’ve finished, place the butter cubes back into the refrigerator to keep them chilled. Now is a great time to start preheating your oven since the dough will come together quickly. Most biscuits will bake at around 425°F but check your recipe as ingredients will affect the bake time and temperature.
Step 2: Add Dry Ingredients
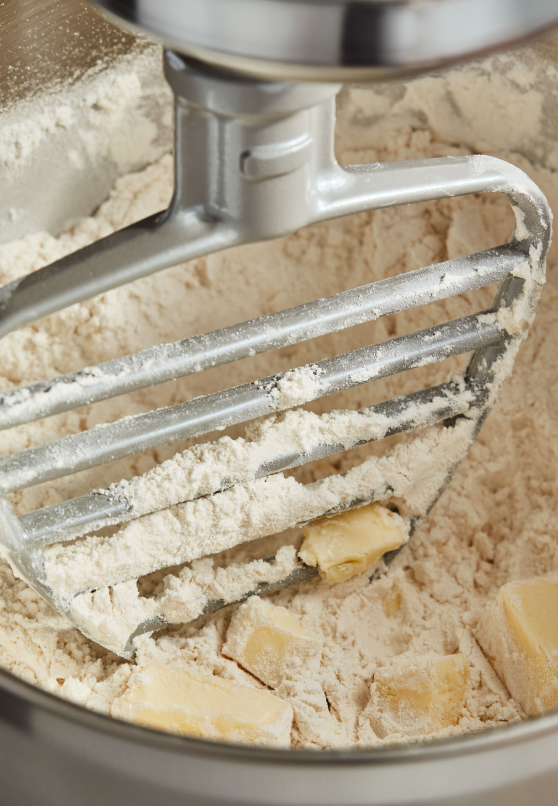
Add the flour and other dry ingredients to your KitchenAid® stand mixer fitted with the Pastry Beater. Set to Stir briefly to mix your dry ingredients evenly.
STEP 3: MEASURE OUT LIQUIDS
Measure your liquids out and set aside so they’re on-hand when you need them. If making your own “buttermilk” alternative, add vinegar to milk and give it a quick stir.
STEP 4: ADD COLD BUTTER
With the mixer still running, add cold butter cubes to the mixer bowl and let it cut in the butter for around one minute or until the mixture has formed pea-sized chunks of butter coated in flour.
Step 5: Add Liquids
Increase to speed 2 and slowly add in your liquids in 2 second increments, then turn off the mixer to avoid overworking the dough.
Step 6: Gather the Dough
Gather the dough in your hands to form a loose ball–the dough should be sticky and shaggy. On a lightly floured surface, gently knead the dough a few times using a folding technique that will help create layers within the dough. Then press the dough out into a thick layer for cutting. See the full easy biscuit recipe for detailed instructions on kneading. Or learn 3 different ways to knead dough.
Tip: When a recipe calls for a “shaggy” dough, it means one that is well mixed but not smooth. A shaggy dough won’t have any dry spots with unmixed flour, but will remain relatively loose.
Step 7: Cut out Biscuits
Using a biscuit cutter or other tool, cut out your desired size and number of biscuits, then place on a baking sheet. Bake per your recipe instructions, usually about 20 minutes. You can brush the tops with melted butter before baking for an extra golden finish.
Tips for Making Biscuits
Be prepared: Before getting started, gather all of your equipment and ingredients, except the butter which should remain in the refrigerator. Keeping everything at your fingertips helps you get into the flow and move smoothly from step to step.
Use very cold butter: Since the butter should still be in solid chunks when your biscuit dough goes in the oven, keep it refrigerated until you need it and work quickly. The heat from your fingers if mixing by hand or taking too long for this step will soften the butter.
Use powered appliances: To further prevent butter from softening, use a food processor or the KitchenAid® Pastry Beater and stand mixer which won’t introduce much heat and can help you move quickly to make your easy biscuit recipe even easier.
Don’t overwork the dough: Biscuit dough should be fairly loose and crumbly and doesn’t take long to mix together. Avoid the development of gluten strands and breakdown of the butter for soft, airy and flaky biscuits by only mixing until the dough resembles small pea-sized pieces.
Lightly flour surfaces: To decrease stickiness, add a thin layer of flour to the surface where you will roll out your dough. You can also dip the edges of your biscuit cutter into flour before cutting them out to avoid overly compressing the dough.
- Bake biscuits about 1 inch apart: Leave a little space between your biscuits on the baking sheet to ensure hot air can envelop all sides for an all-around golden brown finish.


Easy Biscuit Recipes
Once you see how easy it is to make biscuits at home, you can start experimenting with different flavors and additions from sweet to savory. You can adapt nearly any biscuit recipe to use a stand mixer with a pastry beater. Try classic biscuits sweetened with honey and slathered with homemade honey butter. Or add a bit of texture and fresh flavors with Carrot-apple biscuits. To go the savory route, try this buttermilk and chives biscuit recipe or add some fiber and unexpected flair with whole wheat, smoked paprika biscuits. You can even make rich and moist gluten free biscuits with this sweet potato biscuit recipe.

Make Your Biscuit Recipes Easy with a KitchenAid® Stand Mixer
Learn how to make biscuits at home with ease when you use the KitchenAid® Pastry Beater for your stand mixer2. Simply attach the Pastry Beater accessory, secure your bowl, and you're ready to mix, cut in butter, shred, mash and more. Available for select KitchenAid® tilt-head3 and bowl-lift stand mixers4.
2. Sold separately.
3. Fits all 4.5 and 5 quart KitchenAid® tilt-head stand mixers.
4. Does not fit models KG25, 5KPM5, 5K5, 4KSM5, K5SS, KSM5, KSM50, KSM500, 3KSM5, 9KSM5, and KSM450.