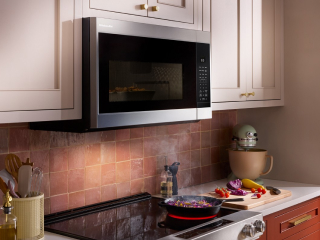
How to replace an over-the-range microwave with a range hood
Over-the-range microwaves are versatile, two-in-one appliances that offer cooking capability and venting power, but replacing your microwave hood with a range hood comes with its own unique benefits. Range hoods feature strong venting capabilities ideal for clearing the air while frying or searing foods, and typically house fans with higher CFM Motor Class1 ratings than over-the-range microwaves. Alongside more powerful venting options, range hoods can elevate the look and feel of your kitchen and sit flush with upper cabinetry to provide plenty of space to use the kitchen range below. Use this guide to learn how to remove an over-the-range microwave and how to install a range hood in its place.
1. Performance varies based on installation. Resources available at AHAM.org.


Removing an over-the-range microwave
Removing an over-the-range microwave doesn’t necessarily require specialized equipment or professional expertise, but you’ll need at least two people to help lift and stabilize the microwave throughout the process. Exact instructions may vary by model, make sure to check the overview below against your model’s installation guide.
Tools
Electric drill or screwdriver
Socket wrench (if applicable)
Step 1: Clear out upper cabinet
The cabinet above an over-the-range microwave is where your microwave plugs in and—if it’s vented through the wall or roof—where venting connects to the unit’s vent fan. Clear all items out of the upper cabinet to make sure there’s plenty of space to disconnect the power, venting and bolts.
Step 2: Remove venting (optional)
Many over-the-range microwaves come configured for recirculation installation right out of the box and are installed without roof or wall venting. If your microwave has exterior venting, you may notice a metal duct coming from the top of the microwave, through the upper cabinets and out through the wall or ceiling. Disconnect the venting from the damper assembly screwed to the roof of your microwave before proceeding.
Step 3: Unplug microwave
Follow your microwave’s power cord to locate the outlet and unplug the microwave from the power source.
Step 4: Unscrew bolts
Your over-the-range microwave is partially secured with two bolts that screw through the floor of the cabinet and into the roof of the microwave on either side. Recruit a second pair of hands to help support the weight of the microwave before you begin unscrewing the bolts. With help in place, use an electric drill or screwdriver to remove each bolt.
Step 5: Rotate and remove microwave
With two or more people, remove the microwave from the mounting plate by slowly rotating the microwave downward, angling the roof of the microwave towards you. Lift the microwave off of the mounting plate and set it down on a protected surface.
Step 6: Remove mounting plate
Locate and remove the screws or bolts securing the metal mounting plate to the wall behind your microwave, typically found in the four corners of the plate. Set the mounting plate aside.

Need help choosing a new microwave?


Installing a range hood
Use this overview to get a general idea of how to install a range hood. Exact installation instructions may vary by model. Be sure to check the installation instructions for your range hood model, or opt for professional installation.
Supplies
Wall mount range hood
Metal ducts
Wire connectors
Caps
Building wire
Caulk
Square PVC trim (optional)
Duct or foil tape (optional)
Tools
Power drill
Twist drill bits
Level
Tape measure
Screwdriver
Wire strippers
Cutting pliers
Caulk gun
Oscillating tool/Reciprocating saw
Step 1: Choose range hood placement
Start by finding the right placement for your range hood and venting. Most hoods come with a paper mounting template that can guide you to the best spot for a vent hole. Simply measure the center point of the wall and select a mounting height, then tape the template to the wall where you’d like to install the range hood. Mark through the template to the spot where the vent hole will go. If your range hood didn’t come with a mounting template, use a measuring tape to determine the best location for venting.
Step 2: Inspect vent location
Before cutting the entire vent hole, cut out a small portion of the drywall where the vent hole will go and inspect the wall for any plumbing or electrical obstructions. Discovering pipes or wiring may mean enlisting the help of a contractor to create a new path for the vent.
Step 3: Cut interior vent hole
The hole for your range hood’s venting should be at least 6 inches wide, but a larger hole will give you more room and visibility while installing the vent and connecting electrical wires. Use an oscillating tool or reciprocating saw to create the vent hole, then drill four locator holes around the edges of the interior vent hole using an extra-long drill bit. This will help you create a vent hole on your home’s exterior that mirrors the interior vent hole.
Step 4: Prepare exterior vent hole
Track down the four locator holes on the exterior siding of your home, then use your oscillating tool or reciprocating saw to connect the four holes in a circle and cut the exterior vent hole.
Step 5: Prepare exterior vent hole
Homes with smooth siding create an ideal work surface for attaching a vent cap. Make sure your vent cap is long enough to connect to the range hood, then apply caulk to the inner lip of the vent cap and position it inside the hole. Screw the vent cap securely in place and caulk again around the exterior to create a tighter seal.
If your home has lap siding or an uneven exterior, cut out a square of the siding around the vent hole and place a square piece of PVC trim—with an appropriately sized vent hole—in its spot. Attach the vent cap to the hole in the trim, then caulk and screw the vent cap securely to the trim.
Step 6: Connect damper
Some range hoods include an interior damper that attaches to the interior vent hole and connects to the vent hood’s exterior damper through ducting. If applicable, place the interior damper in the interior vent hole and measure the space between the interior and exterior dampers to determine how much ducting you’ll need. Cut the amount of ducting necessary to connect the dampers, check that the ducting fits the space and mark the outside of the interior damper to indicate where tape will secure the duct to the interior damper. Tape the duct to the interior damper with duct or foil tape.
Step 7: Connect wiring
Most range hoods require hard wiring and can’t simply be plugged into an outlet. If your space is not already set up for this, you may want to contact a professional for this step. Refer to the installation instructions for your model.
Step 8: Secure range hood
With the help of another person, position the range hood in place with the damper and ducting secured within the vent hole. Remove the grease filter to make tightening screws easier, then place screws through the mounting slots of the range hood and begin securing the unit by tightening the upper screws first. Before tightening screws completely, ensure the range hood is properly in place and completely level.
Step 9: Finish wiring
Refer to the installation instructions for your model to finish the wiring step. If you’re uncomfortable with running and connecting electrical wiring, consult an electrician to complete the process.
Step 10: Complete range hood installation
Reassemble parts you may have removed during the installation process, like filter screens, vent covers or the vent fan. Turn the power to the range hood back on and ensure the hood is running properly.


Microwave and range hood FAQs
Properly installing or removing appliances can help them run smoothly, and protect them from damage. Read on to learn more about how to remove a microwave and install venting for a range hood.
Can I remove a microwave myself?
Over-the-range microwaves can be heavy and removal usually requires stabilizing the microwave from below while taking out bolts or screws. You’ll need at least two people to remove an on over-the-range microwave to help avoid damaging the appliance and surrounding surfaces.
How heavy is a microwave?
Microwave weight varies by type and cubic foot capacity, typically ranging from 20 to 100 pounds. Countertop models generally weigh the least and average about 32 pounds while over-the-range microwaves normally weigh about 60 pounds and built-in models average roughly 76 pounds.
Do range hoods have to be vented outside?
Not all range hoods require external venting. Ductless range hoods filter air then recirculate it back into the kitchen, rather than venting outside. These hoods are most common in microwave hood and under cabinet styles, and are typically labeled as “recirculation” in product specifications. Downdraft and canopy-style hoods are usually ducted and require ventilation. Ducted hoods are often labeled as “vented” on product packaging and are slightly more effective at clearing the air.
Can a range hood be vented through the wall?
Range hoods can be vented through walls with direct access to the outdoors, but not every perimeter wall is compatible with venting. Existing plumbing or wiring may get in the way of range hood venting and, in some cases, you may need a contractor’s help to create a new path for the vent. Range hoods can also be vented through the ceiling or floor.

KitchenAid® microwaves
Maximize your cooking options
From built-in and over-the-range to countertop microwaves, KitchenAid brand has microwaves that complement your kitchen and cooking style
Explore KitchenAid® range hoods

KitchenAid® Hardware Accessory Kits
Curate the colors and textures that move you
From bold Black Ore to the inviting warmth of Bronze, mix and match handles and knobs to refresh your appliances and bring new energy to your kitchen