


Bake vs. broil vs. roast: What’s the difference?
Knowing the differences between bake vs. broil vs. roast oven settings can help create a properly seared piece of meat or a deliciously crisped cookie. Use this guide to understand some of the types of foods, cookware and recipes to use for these settings and how to fine-tune your baking, roasting and broiling techniques.
Baking, roasting and broiling are all functions of your oven, and they are each used to produce specific results.
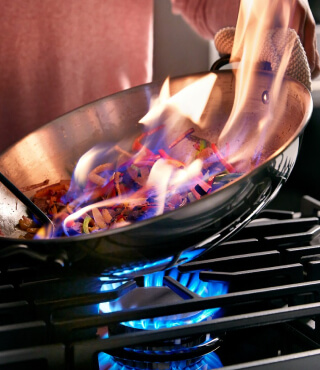
Broiling can mimic grilling and cooks food using high temperatures. When food is placed close to the heat source, it cooks quickly and produces a seared or charred edge.
Baking uses dry heat at lower temperatures to slowly cook unstructured food such as batter or dough, gently browning the surface while solidifying the interior.
Roasting is similar to baking, but uses higher temperatures to cook food such as prime cuts of meat and vegetables, while also producing a crisp, caramelized surface.
Whether you have a conventional or convection oven, gas or electric range, double wall or countertop oven, these cooking methods and settings apply. If you have more than one of these appliances, you can use one to bake or roast, while broiling in the other.
Discover more about how a convection oven works and how to use it for cooking and baking. Learn how to grill indoors in the oven as well.


What does broil mean in an oven?
The broil setting on your oven cooks food quickly with direct heat—typically at 550°F (289°C)—and produces a seared finish that’s similar to grilling. Smaller or countertop ovens usually preheat to the broiling temp faster, so you can quickly finish baked or slow-roasted dishes with crisp browned edges.
Position food close to the broiler so heat reaches and cooks it successfully. Depending on your oven, this may mean moving the rack to the top or bottom of the oven. Broiling sears the surface of food and works great for cooking thin meats and vegetables. This method can also be used to add texture to the surface of food that has already been cooked using another method like baking or roasting.
What food can you broil?
Broiling may be suitable for everything from steak to sliced pineapple. Keep reading for more ideas of foods to broil.
Broiling applies intense, top-down heat at high or extra-high settings to brown and crisp a food’s surface. For this reason, cheesy casseroles like homemade mac and cheese or lasagna may be ideal for broiling.
Select broil to brown finished dishes or to sear thin cuts of meat or fish that don’t need a high internal temperature. A few good choices include steak, chicken and salmon.
Broil diced or sliced pineapple to caramelize the sugars for a quick and delicious side to accompany fish or chicken.
Broiling cooks delicate foods quickly with temperatures up to 550°F, so try it for vegetables such as asparagus, bell peppers and zucchini.
The broiler may be used to toast bread, including garlic bread and crostini.


How do you broil in the oven?
Broilers vary by oven, so consult your owner’s manual for model-specific guidance. If you’re cooking from a recipe, review that as well. Then, follow these steps and tips:
Step 1: Preheat the broiler
Select Broil on the control panel to start. If your oven lets you set a temperature, match it to the food—use a higher temperature for thin, quick-cooking items and a lower temperature for thicker pieces that need more time. Let the broiler preheat for at least five minutes.
Step 2: Position your dish under the broiler
Choose appropriate cookware: a broiler pan or cast-iron skillet works well, though any shallow metal pan can do. Position the rack either directly under the broiler, or one to two levels below. The rack should be closer for a quick sear, and lower if the food needs more time to cook through.
Step 3: Watch broiling closely
Because broilers run very hot, stay close to the oven to keep your eyes on your food. Turn or rotate items for even color. If the top is browning faster than the inside is cooking, lower the rack, reduce the broil setting (if available), or switch to Bake briefly to finish—then return to Broil. Always confirm with your recipe. In general, garlic bread may take one or two minutes while vegetables like zucchini could take 10 to 20 minutes.
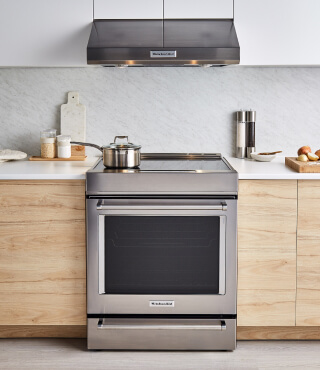
Shop KitchenAid® wall ovens
KitchenAid® wall ovens can make it simple to bake, broil and roast. Select models from KitchenAid brand feature No Preheat Slow Roast, which provides tender meats, pastas and much more without the hassle of a separate appliance. Other KitchenAid® wall ovens offer Assisted Cooking Modes that suggest cook times and temperatures on an easy-to-navigate touch screen so you can explore new recipes with confidence.


What is the bake setting on an oven?
Baking uses dry heat to surround food with hot air that is set to temperatures up to around 375℉ (190℃). Use your oven’s bake setting with the rack placed in the center so hot dry air surrounds the pan and cooks the food slowly without causing the surface to brown or crisp too much or too quickly.
What foods can you bake?
Baking is ideal for unstructured foods that require slow cooking such as cake batter, cookie or bread dough, custard, quiche, souffle and oven-baked ribs. Explore some dishes that can be baked, below.
Baking is a go-to method for foods that start out without a structure, such as cookies, pies, cakes, breads and more. Baking’s gentle, lower heat allows the food’s shape to form gradually while keeping moisture intact.
Baking is also a good choice for thicker cuts of meat—like poultry or pork—that need thorough cooking without the risk of drying out or burning at higher temperatures.
Baking’s gentle, even heat can cook dense, layered dishes like lasagna, ziti, macaroni and cheese, and casseroles all the way through without drying out. Keep the dish covered for a creamier, more moist result, or uncover toward the end to encourage bubbling, browning and a crisp top.
Need help finding a new range?
Compare different types of ovens


How do you bake in the oven?
Baking is frequently used for family dinners and desserts. The following steps and tips can help you bake with confidence:
Step 1: Preheat oven as directed by your recipe
Be sure to let the oven reach the set temperature before putting food inside. Preheating ensures the cycle works as intended and helps deliver the expected results. Always double-check recipe times to avoid over- or under-cooking foods.
Step 2: Choose regular or convection bake
The key differences between convection bake and regular bake are cooking speed, temperature and heat distribution, and the final result. Convection typically cooks faster and delivers even results across multiple racks. Regular bake is often preferred for cakes, breads and other delicate desserts because the slower process is gentle. If you want crisp, well-browned outcomes, choose convection.
Step 3: Pick the right cookware
Place your food on a baking sheet or in a casserole dish, preferably on the center rack for ideal results. Check your owner’s manual for the best rack position, as it can vary by cycle and cavity. To encourage browning and limit excess moisture, opt for shallow dishes. Note that dark, dull, nonstick or glass pans often bake faster and may need less time, while insulated or shiny stainless pans can cook slower and may need a bit more time.
KitchenAid® cooktops
Cooktops made for every culinary adventure
KitchenAid® gas, electric and induction cooktops offer the versatility, performance and craftsmanship you need to create your favorite recipes
Step 4: Learn when to cover food
Cover food when you need moisture; uncover it to brown. While many baked dishes cook uncovered, some recipes call for a lid or foil early on to help lock in moisture. Hearty dishes—like lasagna and casseroles—often start covered to prevent drying, then are uncovered near the end to achieve golden, bubbly browning.
Step 5: Test for doneness
For meats, rely on a cooking thermometer to confirm they’ve reached the ideal internal temperature before taking them out. For casseroles and baked pastas, look for bubbling edges and a browned, crisp top as visual cues that they’re ready.


What is roasting in an oven?
Roasting, like baking, is a method of cooking that uses hot, dry air to cook food in the oven, but at higher temperatures. Roasting is typically used for foods with a solid structure such as vegetables and meats. Roasting generally uses the bake setting at about 400ºF (204ºC) or higher to brown the surface and develop flavor.
What food can you roast?
Roasting browns and caramelizes the surface of food, producing complex flavors, and is often the best method for cooking prime cuts of meat and vegetables. Read on for general ideas of what to roast.
Roasting cooks at higher temperatures, which helps meats develop a deep brown crust and crisp edges while the interior cooks through—especially when cooked uncovered for most of the time. It is well suited to structured foods, from sturdy vegetables (cauliflower, carrots) to dense cuts of meat like ham, tenderloin or your Thanksgiving turkey.
The high heat of roasting means you can get a flavorful brown, crispy exterior on food like potatoes and sweet potatoes.
Consider roasting a mix of meat and vegetables to create an easy sheet pan dinner.


How do you roast in the oven?
Roasting builds rich flavor and texture across meats and vegetables—even fruit—by developing crisp, caramelized surfaces and tender interiors. Use these tips to help get dependable results on family favorites.
Step 1: Set the oven temperature according to your recipe
Roasting temperatures vary by dish. Some recipes begin low and slow; others start hot. As a general guide, begin at a higher temperature for large cuts, then lower the heat so the exterior doesn’t overcook before the center is done. Higher temperatures also work well for smaller cuts and most vegetables.
Step 2: Prep and position ingredients in the pan
Choose a sturdy roasting pan that fits what you need to cook. A rack inside of a pan lifts food above any rendered drippings. For larger items (like whole chickens or turkeys), the bottom or lower oven racks are ideal for positioning; use the center rack when roasting vegetables.
Refer to your recipe and owner’s manual for exact rack placement, which can vary by cycle and cavity.
Step 3: Monitor temperature and baste if your recipe calls for it
Use a cooking thermometer to confirm meat doneness. Vegetables are ready when they’re fork-tender with noticeable browning and texture. If basting (spooning pan juices or marinade over the meat), avoid opening the oven too frequently to help prevent heat loss and cycling that can affect cook time.
Step 4: Rest before serving
If you’re cooking meat, let it rest for 10 to 20 minutes before slicing so the juices can redistribute. You can also deglaze the pan to make a quick sauce.
When to choose bake, broil or roast


When to use convection bake and roast settings
If your electric oven offers convection, you may see bake, convection bake/roast and broil settings. Both conventional and convection ovens use dry heat, but conventional models heat from the top and bottom (which may create uneven spots depending on where your dishes are placed). Convection ovens use a fan—and true convection ovens add a rear heating element—for more even, multi-rack cooking.
Use convection when you want uniform results or crisp textures: the fan circulates heat across all racks and drives off excess moisture, yielding crispy meats, caramelized vegetables and flaky, fluffy baked goods.


When to use bake vs. roast vs. broil oven settings
Understanding the important differences between your oven’s settings for baking, roasting and broiling helps expand your culinary horizons. You can produce baked goods that have a light, delicate crumb with a crisp, flaky edge as well as juicy roasts with deep, caramelized flavor.

When to use bake
Baking uses moderate heat to cook food through and create a browned crust. It’s often used for unstructured dishes—like casseroles, quiche or lasagna—and for smaller cuts of chicken or fish. The method also often builds surface color and texture without drying the food out too quickly.

When to use roast
Roasting uses the same dry, surrounding heat as baking, but at higher temperatures, typically 400-450°F. Choose it to brown and crisp thicker, sturdier foods.

When to use broil
Broiling uses only the oven’s top heating element, blasting high heat onto the surface for quick flavor. You can quickly put a charred, crisp finish on appetizers or slow-cooked dishes with your broiler. After baking, roasting or broiling, clean your oven glass with this easy how-to guide.

KitchenAid® Hardware Accessory Kits
Curate the colors and textures that move you
From bold Black Ore to the inviting warmth of Bronze, mix and match handles and knobs to refresh your appliances and bring new energy to your kitchen
